Override visibility of any element in Revit using Visibility/Graphics Override

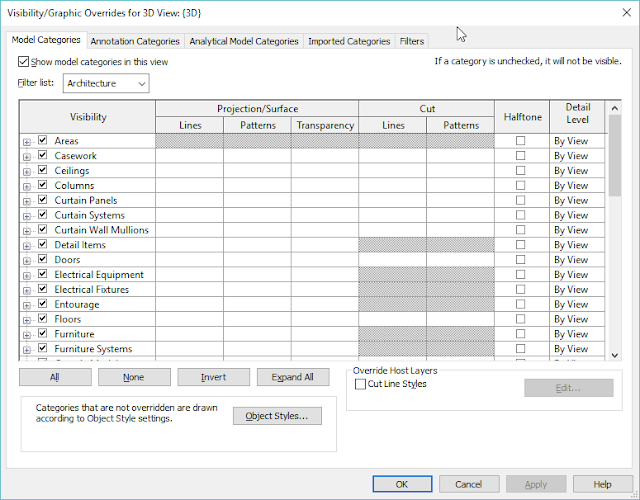
At times we might want to change the colors of various lines, categories with the model. The well known and easily foundable way for this is using the properties window. But, selecting each and every object and changing their properties can be ver tedious. So Autodesk has provided us with a  single window called "Visibility/Graphics Override" which can be found in View > Graphics > Visibility/Graphics or can simply be accessed using "VG or VV" shortcut key.

This post focuses on model & annotation categories. Head to the following post to change the graphics of Object Styles.


Visibility/Graphics Location

Visibility/Graphics window
Once you have made the necessary changes to the visibility/graphics of the view, you can save it as a view template, so that you can apply the same settings to multiple other views.

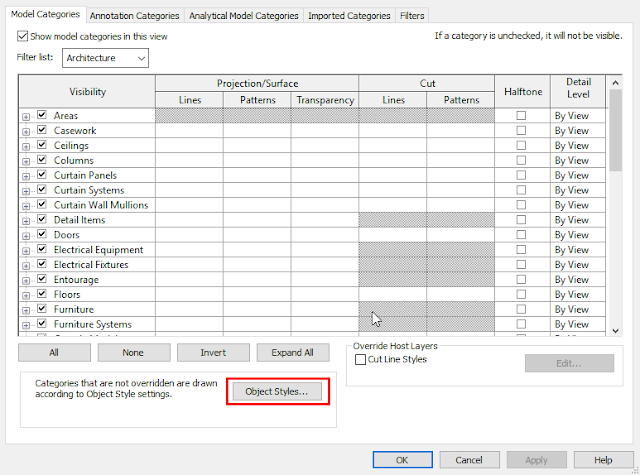
The VG window can be used to change the visibility/graphics settings of any type of elements that exists in the Revit project. You can change the colors, thickness, pattern etc of all the categories. For those categories, that are not visible in VG window. You can find them in Object styles window which can be located at 2 places

  1. Manage > Settings > Object Styles
  2. Object styles location
  3. Within the Visibility/Graphics window
Object styles location
The object styles window should look like this 
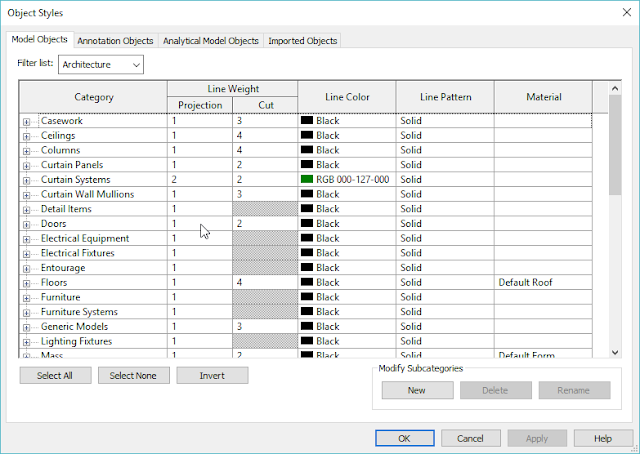
Object styles window
For a detailed explanation of how to use Object styles to manipulate the colors and visibility of various annotation symbols and categories, go to the following link

Comments

Popular Posts

Power Query - "SUBSTITUTE" Function: Remove/Replace multiple values in a column in One Step.

Often times, when you get data from a source, there will most probably be something incorrect that needs to be fixed using an ETL process of Power Query. And most of those transformations would require either Replacing or Removing string's that are not necessary. For example, if you extract any financial data from a source which has multiple currency symbols, there's a chance that the numbers get extracted along with the currency symbols like "$700"/"€700" instead of 700. And these type of cases makes it tough to Transform the Data to our wish as the value will be considered as a text instead of a number. In those type of cases, we would most likely have to create multiple steps to remove the multiple currency symbols from the Column. But thanks to the solution provided by Marcel for one of the questions posted on Stack Overflow, with a little manipulation of the Query language (M), we can replace/Remove multiple strings in one step using the List. ...

Scribble on your PC/Mac screen with these annotation tools

     While you are in a presentation or hosting a webinar, you might want to write/highlight a part of your screen to draw the attention of your audience on something important. Although you can use the tools from powerpoint to scribble in the PPT file, you might want to write something on other apps as well.      That's where these awesome apps come into play. Although these apps have similar features, you might prefer one above the other. ZoomIt :       ZoomIt is an application developed by Microsoft which can be installed from the following link . It is a free tool with features like Text, Shapes, whiteboard, blackboard, zoom . When activated, the tool converts the current screen into a static image and allows you to draw/write on it. One the tool is activated, you can also choose to create a whiteboard/blackboard screen on your PC to draw on. Although the colors are limited to 6 colors: Red (R) , Green (G) , Blue (B) , Orange (O...

Grasshopper: offsetting curves on surface vs scaling curves on surface

Though in Grasshopper Offset and Scale are two different node functions, when it comes to a planar surface, the results of the both are similar. But, I found the " Scale" node to be effective when you want to loft the resultant curve with another. The following images show the different results of a Voronoi structure that yielded when scale and offset nodes are used. When the Offset node is used When Scale is used

Grasshopper: Voronoi Holes on a Planar surface

One of the best natural examples for a Voronoi is the Wing structure of a dragon fly.Grasshopper can help us to build a shape like this in Rhino. Image Courtesy:  The Pond blog Grasshopper by default has a node for Voronoi, we just have to prepare the necessary information to feed into the node. The following example shows how to create a Voronoi shaped holes in a surface Create a planar  Surface  from rhino or grasshopper Randomly Populate the surface with points using the  Populate 2D  Node Feed the surface and the points into the  Voronoi  node and feed a number slider too to adjust eh radius This forms the required Voronoi structure which you can edit the number of points or radius. To create the holes we need to offset each and every inner portion towards its centre using the  Scale  node We can find the centre of each of the inner portions using Area node I'm not sure why but using the offset command su...