Sketchup is an amazing 3D modelling tool. It's not just easy to learn, but also has lots of customization option and plugins that can be very helpful.
Site Modelling
Although you can just draw a few rectangles and lines to extrude and form a skyline or a block model, SketchUp by default allows you to interact with Google Earth, where you can find lots of existing 3d Sketchup models available for download. You can also set the geo-location of your project and select the region you want to import into your model environment. Doing this can help you in 3 ways:
You don't have to worry about the scale of the site, google earth imports the site as a texture laid on a surface
This can help with the existing contours of the site if any.
You can use the existing models of the surroundings and without having to worry about the orientation of that model
You can find the add location tool in SketchUp at File > Geo Location > Add Location, or you can use check the Google Toolbar to view all the options available.
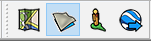
Google Toolbar
The 1st option lets you add a location.
2nd lets you switch between show terrain & hide terrain
3rd lets you add photo texture of surrounding building façades or road layouts if you wish, to your surfaces.
The 4th lets you preview your model in google earth if you wish to publish it in google earth
Sketchup - Show Terrain
The following video explains in detail how to use the tools to perfectly set your site up.
Often times, when you get data from a source, there will most probably be something incorrect that needs to be fixed using an ETL process of Power Query. And most of those transformations would require either Replacing or Removing string's that are not necessary. For example, if you extract any financial data from a source which has multiple currency symbols, there's a chance that the numbers get extracted along with the currency symbols like "$700"/"€700" instead of 700. And these type of cases makes it tough to Transform the Data to our wish as the value will be considered as a text instead of a number. In those type of cases, we would most likely have to create multiple steps to remove the multiple currency symbols from the Column. But thanks to the solution provided by Marcel for one of the questions posted on Stack Overflow, with a little manipulation of the Query language (M), we can replace/Remove multiple strings in one step using the List. ...
One of the best natural examples for a Voronoi is the Wing structure of a dragon fly.Grasshopper can help us to build a shape like this in Rhino. Image Courtesy: The Pond blog Grasshopper by default has a node for Voronoi, we just have to prepare the necessary information to feed into the node. The following example shows how to create a Voronoi shaped holes in a surface Create a planar Surface from rhino or grasshopper Randomly Populate the surface with points using the Populate 2D Node Feed the surface and the points into the Voronoi node and feed a number slider too to adjust eh radius This forms the required Voronoi structure which you can edit the number of points or radius. To create the holes we need to offset each and every inner portion towards its centre using the Scale node We can find the centre of each of the inner portions using Area node I'm not sure why but using the offset command su...
Though in Grasshopper Offset and Scale are two different node functions, when it comes to a planar surface, the results of the both are similar. But, I found the " Scale" node to be effective when you want to loft the resultant curve with another. The following images show the different results of a Voronoi structure that yielded when scale and offset nodes are used. When the Offset node is used When Scale is used
In any Revit project, the orientation of the North is always set to the top of the screen. But this might not be the case with all the projects. All the projects are not oriented parallel to the North direction, and we might want to orient the project to the true north direction. In one of my previous posts, I have explained the difference between Project North & True North and how we can use them in any project. In this tutorial, I'll show you how to Set/Change the Orientation of True North. Go to any Plan view. Go to Manage tab in the ribbon and click on "Position" drop-down in the "Project Location" toolbar. Then choose "Rotate True North" from the drop-down list. Rotate True North This will show you 3 different ways to change the orientation of the True North. They are 1. Manual Rotation Upon clicking the "Rotate Ture North", Revit will automatically prompt you for manual rotation of the orientation. You can use...


Comments
Post a Comment